Tuesday, May 31, 2011

Building Planter Boxes for the Deck

Yesterday was spent looking for just the right kind of lumber for a planter box project.  Our original thinking was to create some planter boxes that could be attached to the deck railing that would surround the gazebo on the deck.  So off we went to Home Depot.  Of course we got side-tracked and wound up at a dollar store (looking for plastic hanging baskets), and then we stopped at one of those tent sales to look for hanging plants (but they all seemed to be over-priced), and then finally we arrived at our intended destination where we spent a good while looking at the plant selection.

But as we weren't there to buy plants, we ambled over to the lumber area to look at prices and options for what we had in mind.  We finally settled upon furring strips as an ideal lightweight and inexpensive choice to build some planter boxes.  The design we came up with was fairly simple:  two furring strips along the bottom with a space in between them (to allow for drainage), and two furring strips on each side.  With our son's help the planters were quickly made and installed.  They actually looked so good that my wife now wants us to make a whole bunch more to completely encircle our deck railing.  Altogether our lumber cost was about $9 for each eight-foot planter.  Not bad.

Robert attaches a planter box to the deck railing
Something (I-don't-know-what-it-is) is blooming in our shade garden
Here's another plant (the name escapes me) that 's doing well... in the fall it has these nice pink blooms
I love taking pictures of my wife enjoying herself in the garden (hmm... looks like I'll need to weed the walkway)

Sunday, May 29, 2011

Bugs & Scale & More Bugs

"Look honey," she said, "this is what scale looks like".  Of course, I acted as if I knew what that scabby looking thing was on the tomato plant (but I was clueless).  So I looked it up here, and now I am an expert... well, not really... but I know more than I did a few days ago.  When my wife sees these scaly things she either picks off the infected leaves or crushes them (there might be a more scientific way of dealing with them, but sometimes the simplest solution is best).  With all the hot weather in the last few days we have certainly noticed a lot more bugs around -- and with the local bat population still suffering from that white nose fungus, there seem to be more bugs in the air as well.  Here's a few pics of some common bugs:

That thing on the plant is called "scale" (it's actually an insect)
My friend, the spider
It's a caterpillar
This might be a flying ant
Lousy photography, but that's some kind of worm on the back of the leaf

Grooming the Shade Garden

A garden path is supposed to look relatively clean, with friendly plants coming up to the edge to say hello.  Unfortunately this year my ground cover must have been on steroids and decided to cover the garden path wherever possible.  This meant a bit of work for me.  First, the ground cover had to be pulled out by the roots, (but of course, they have these tendrils that shoot out and develop new sets of roots, so you're always pulling out a multiple set of roots).  It's an OK job in the shade even on a humid day but it does take a while.  Afterwards, the harvested ground cover has to be replanted.  I picked another shady spot and planted them a bunch at a time by dropping some very moist top soil on top of their roots.  Hopefully, they'll live... they seem to be fairly resilient.  A few pics:

This is what a garden path should look like -- clean with rocks at the edges for the frogs -- do you see them?
This is what my garden path looked like after the ground cover decided to take over the world
A bit of trimming, and presto!  you can see the path again!

Memorial Day Weekend Gets Started

Having finished building the gazebo (well... almost finished), it was time to bring in some furniture, to get the barbeque started, and to enjoy the filtered light offered by a lattice roof.  Naturally, I did a great job of getting the coals lit (it only took three attempts and a whole bunch of lighter fluid), and before long the burgers and hot dogs were sizzling.  A great time to relax, and to plan out what kinds of plants were going to adorn the gazebo.  We first decided upon a variety of Asian string beans (very long) and then changed our minds in favor of Kentucky pole string beans and cucumbers.  A few daisy seeds were added (primarily because they're both colorful and perennial).  I'd love to try some grapes again, or climbing roses, but in past years we haven't had any luck with these... but I'm sure we'll experiment again.  It's what we do.

Some furniture is added to the gazebo
The chips and salsa come out
OK... let the barbeque begin!

Woodworking 101

Maybe it was because the weather was so beautiful, or perhaps it was because it looked like I was having all the fun with the power tools, or possibly it was because she just had to have a new set of plant box holders, but whatever the reason, today my wife expressed an interest in learning how to use the miter saw.  What a delightful moment!  The lesson began with safety instructions -- yes, you need to wear safety goggles and you need to have as many fingers at the end of the project as when you started (which means that you wait for the saw blade to stop spinning before you try to remove any cut pieces).  ...and she did a great job!  She accurately measured all the pieces she needed to cut and didn't make any mistakes.  I was so proud, and so was she when she assembled her piece piece of plant furniture.

The miter saw awaits Chauly's first creation
Measuring a cut by using a another piece as a size template
Look, it's furniture!  A plant box holder! 
Chauly modeling her first woodworking project.  Great job!

Saturday, May 28, 2011

Power Tools: The Joy & Heartbreak

Today my wife decided to use the power drill to put some drainage holes into a bucket that she was planning to use as a planter... and she did a great job... unfortunately, when she next decided to add drainage holes to some plastic hanging planters (the kind that you get at the dollar store), it didn't exactly go as planned:

Chauly adds some drainage holes to a bucket planter
The process is repeated on a cheap plastic hanging planter
Ooooops... next time, I'll use the glue gun tip to melt some small holes
Finally!  The clematis is blooming!
Even the cucumbers have started flowering

Completing the Gazebo

Maybe it's just me, but whenever I come close to finishing a project I start freaking about about the possibility that something will go wrong at the last minute (and invariably it does... a self-fulfilling prophesy perhaps).  At the very end of this gazebo project my miter saw started acting weirdly -- instead of stopping within a few seconds after a cut was made, it continued to spin for a while longer.  Oh oh... immediately I started thinking "Where can I find a repair manual?  Is there one online somewhere?  Do I need to replace the unit?  Is it a broken part?  Where the heck is a service center?  Is my warranty still good?"  The thoughts that ran through my head were akin to panic.  Not good.  Fortunately, my son was at hand, and with a wrench and a simple twist, he tightened up something that needed to be tightened, and then everything in the world was wonderful again.  Cooler heads will always prevail.  Some pics:

Lattice is mounted on the rear of the gazebo
Robert screws the lattice onto the frame
Lattice has been added to the front and the trim at the edges will be added next

Balusters and Rails are added to the front
Another railing is added to the side and we're almost finished
Next on the list:  a bit of hand-saw work, some ornamental and/or functional braces, additional cross-beams (if they are needed for aesthetic or plant-hanging purposes), perhaps some exterior wood stain... but most importantly... some plants and furniture to turn the gazebo into a very special and relaxing place.  

You might wonder what overall tips I can give you at the end of this project -- first, always get yourself a great and willing assistant; second, buy your lattice at Home Depot instead of Lowe's (same price but vastly superior quality); third, keep making your wife happy (you'll have a better life).

A Home for the Beans

Memorial Day Weekend marks the start of the pole bean planting ceremonies in our household.  Pole beans are a great plant.  They grow quickly and they grow tall, but most importantly, they are delicious to eat -- which makes proper preparation for the plants an absolute must.  As these beans will rapidly vine and cling onto any adjacent upright, we begin by putting bamboo stakes into the containers that will hold our beans.  Next, these stakes are lashed together at the top with a bit of twine to form an overhead canopy so that all these wonderful beans will have all the sun they need -- and added benefit is that the beans will be easy to reach and pick.  Here are some pics that explain things better:

Look, it's easy!
It does help to have an assistant, and a stepladder
Just tie it with a bit of twine and any type of knot that works
Can't wait to get the beans planted!  This year we've got lots and lots of them!
Thanks!  How did you know that I needed a cup of coffee?

Friday, May 27, 2011

Raking Away the Straw

After last night's severe thunderstorm, the morning was cool and crisp with just a hint of sunshine -- the perfect time to do some necessary yard work. As the disaster that calls itself my lawn was starting to come alive... the re-seeding and over-seeding was taking effect (as blades of grass were now growing where only ugliness lived before), it was just the right moment to begin removing the straw that I had placed over the seeded barren patches. 

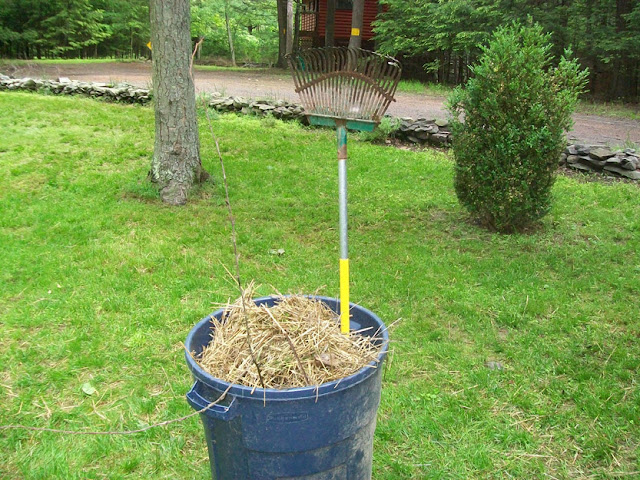
I worked slowly.  Very slowly.  I didn't want to damage any of the young baby grasses (and admittedly I own a lousy rake that's badly in need of replacement).  After two hours of work I had finished perhaps 30% of the straw-covered areas... but it was looking good.  And no, I didn't do a perfect job... that can wait until I finish the other 70% and after the grass has come in a bit stronger -- but not bad for an intermediate measure.  At this rate my lawn will be just perfect for a putting green in perhaps... a couple of years, but one can dream.  Altogether I managed to clear away two trash barrels worth of straw.

When the work day is over (we all have real jobs), I'll continue with the work on the gazebo.

Chauly cleans off the debris that came down in last night's storm
Here's the first batch of straw raked up
Look!  This used to be barren and ugly, now it's becoming green.  Even Rocky (our dog) appreciates the process

Hooks for Hanging Plants


Perhaps I'm a bit of a retard when it comes to matters like this, but I have never been able to get those fat hooks that you use to hang plants into wood beams easily... it has always been way too much physical work to get the screw portion started, and then your wrist would wind up hurting after installing just a few of these hooks.  Thankfully, I've found a video that makes this aggravation a thing of the past, and now I'm looking forward to a gazebo just filled with hanging plants.

Killing Ants without Pesticides

A friend of ours writes:  "I have another new job title among everything else in this house. Exterminator. Anyone getting ants from all this rain?  Can't figure how and why I'm getting them. Never had them before. They're little ants."  This video might help:

Thursday, May 26, 2011

Admittedly, we live in a really strange township

Like many other townships across the country, ours too has laws in place to regulate burning.  But in our community, the township itself is noted for being the most flagrant violator of its own laws.  Last year the town collected yard waste and wood products during a bulk residential trash collection and proceeded to burn them up.  The word quickly got out to the State Department of Environmental Protection which then cited the township for the violation.  Not to be deterred, the township next decided to enact a second illegal burn (wood skids), and has just recently accepted a $9,050 state fine for illegal burning along with other settlement obligations -- one of which will be the enactment of a mandatory leaf collection program.   

I'm looking forward to this leaf collection effort... and knowing our township, I'll be delighted to take the photos whenever they decide to burn the leaves that they have collected.  Thanks to the Pocono Record for keeping us updated on our ongoing township shenanigans.

A Delightful Courtship from Down Under

Courtship display and mating in an as yet unnamed species of peacock spider (Maratus sp.) from southeastern Australia, with music by Delicate Beats, Olive Musique and Emmett Cooke.


Hmm.....  all of a sudden, I have developed a new appreciation for spiders.  I have to wonder if we also have  such colorful spiders somewhere here in the Poconos

The Garden in the Morning

The morning always starts early when you have children that need to go to school.  After they're off to their world of educational bliss, it's a great time to have a walk around the garden while the birds are chirping and dew awaits the kiss of the rising sun.  It's a chance to reflect upon the day ahead and to see what progress is being achieved...  

Plant containers can be made from almost anything
I'm told that this is an air yam that will soon need to go into the ground
a few hanging baskets are created
Finally, the Clematis begins to bloom this year
This is a male Kiwi plant (no luck yet with the female Kiwis that we tried)

Repairing, Rebuilding & Re-Planting

Every year I wind up complaining about all the damage from either a hard winter or from ever-more-frequent storms, and this year was no exception. Although we've had tornado watches, and hail watches, we've actually been rather fortunate with no real damage from major events (compared to other folk)... so I should learn to temper my remarks and to realize that Spring is all about rebuilding, replanting, repairing and renewing.  Some pics:

a branch comes down with such force that it shatters my bench
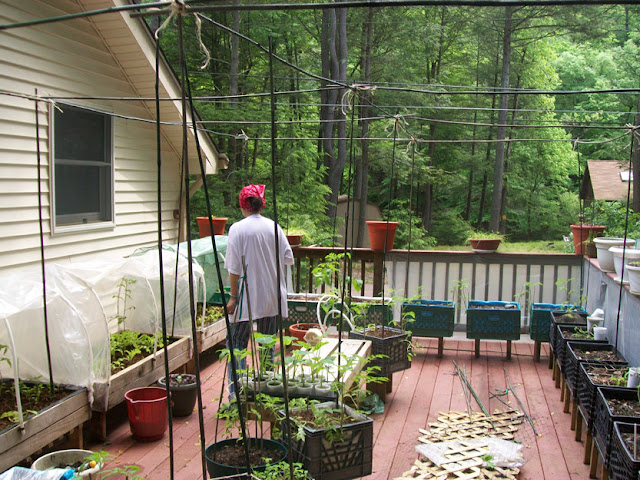
getting the side deck organized
Preparing the containers (notice the re-cycled bags used as liners)
The roofing is almost done...
The lattice roof is complete; our snap beans are gonna love this roof!

Tuesday, May 24, 2011

Exploring the Shade Garden

I love the concept of a shade garden, a tiny niche reserved for wild and not-so-wild plants that thrive in shady conditions.  This morning was the first chance I had to see the sun peek out after a week's worth of rain, so I took a moment to explore our shade garden area.  This area, too, will require a bit of maintenance in the coming weeks (although the frogs seem to love it as is).

In the midst of a shade garden rhubarb flourishes

the first plant our son bought for his Mommy (12 yrs ago); it made her the happiest mom in the world

Ferns find a home between the rocks

A peek at our house through the deer mesh

You can't have a shade garden without hosta, and they seem to be thriving this year

Alium starts to bloom against a backdrop of ferns